
A tissue carton may look like one of the simplest packages on a store shelf, but a quarter-inch size change can stop it from fitting a bathroom cover, alter how the next tissue presents, reduce the number of cartons in a shipping case or move artwork into the dispensing opening. Reliable tissue box dimensions must therefore identify the exact format, tissue count, measurement type and intended decision rather than repeat one “standard” number.
Rectangular, cube, boutique, family-size and institutional cartons all exist in the U.S. market. Even two cartons holding a similar sheet count can differ because the tissues use another fold, ply, sheet size, compression level or dispensing system. This guide from Packaging NextGen explains useful planning ranges, how to measure a carton and cover, and how size connects with paperboard, dielines, printing, case packs and quality checks.
Tissue Box Dimensions Quick Answer
There is no single universal tissue carton size. Published packaging guides commonly place low-profile rectangular cartons near 9 × 4.5 × 2 inches and cube cartons near 4.5 × 4.5 × 5 to 5.25 inches, but current guides and cover listings show enough variation that these figures should be treated as reference points, not manufacturing standards.
For a real packaging job, record:
Finished external length × width × height, plus the unit, tissue count and carton style
Use external dimensions when choosing a tissue box cover, planning shelf space or arranging cartons in a master case. Use internal dimensions when engineering room for the folded tissue stack. Use score-to-score dimensions when preparing the flat carton structure.
Common Planning Ranges
| Tissue package format | Approximate external planning range | Typical use | Important note |
| Low-profile rectangular carton | 8.5–9.5 in L × 4.25–5 in W × 2–3.5 in H | Home, office and retail facial tissues | Height varies considerably with count and fold |
| Tall or family rectangular carton | 8.5–10 in L × 4.25–5.25 in W × 3.5–4.75 in H | Higher-count retail pack | May not fit a low-profile cover |
| Cube or boutique carton | 4.25–5 in L × 4.25–5 in W × 4.75–5.75 in H | Bathroom, bedroom, office and vehicle | Square footprint does not mean all four sides are identical after forming |
| Institutional dispenser carton | 8–10.5 in L × 4.25–5.5 in W × 3–5.5 in H | Clinics, offices, hotels and public areas | Supplier and dispenser system control size |
| Travel soft pack | 6–9 in L × 3–5 in W × 1–3 in H | Bags, cars and travel | Flexible packs change shape as tissues are removed |
These ranges are useful for early design and content planning only. Do not create a production dieline, retail fixture or cover cavity from this table. Measure the selected product or approve a dimensioned supplier drawing.
Are There Standard Tissue Box Dimensions?
The word “standard” is convenient for shoppers, but it can be risky in packaging specifications. Tissue brands often work within familiar rectangular and cube proportions because those shapes fit shelves, cases and consumer expectations. That does not create one regulated or industry-wide carton size.

Packaging suppliers repeatedly quote a 9 × 4.5 × 2-inch rectangular carton. Other current guides describe rectangular cartons around 8.5 × 4.5 × 2.5 inches or use height ranges reaching 3.5 inches. Cube references commonly sit near 4.5 × 4.5 × 5 or 5.25 inches. The differences may reflect separate products, copied estimates, tissue counts or measurement conventions.
Packaging NextGen recommends labeling any chart as one of the following:
- A measured retail-product example
- A supplier’s stock-carton size
- An approximate market range
- A proposed custom-pack dimension
- A finished external dimension
- An internal cavity dimension
- A flat blank or score-to-score dimension
Without that label, three numbers can look authoritative while describing different things.
Why Tissue Box Dimensions Differ Between Brands
Carton size can change with:
- Number of tissues
- One-ply, two-ply or three-ply construction
- Open sheet length and width
- Folded sheet footprint
- Interfold pattern
- Tissue caliper and bulk
- Stack compression during loading
- Space needed for the first pull
- Dispensing slit or paper aperture
- Board caliper
- End-flap and glue-seam structure
- Retail shelf and case-pack requirements
- Regional product line
- Promotional or seasonal pack format
A higher tissue count does not always create a proportionally taller box. A brand may use thinner tissue, tighter compression, a different sheet fold or a wider footprint.
Rectangular Tissue Box Dimensions
Rectangular cartons are usually long and relatively low. Their broad top panel provides room for an oval or rounded dispensing opening, and their long side panels provide large branding areas. They also pack efficiently in shelf trays and shipping cases.
The frequently quoted 9 × 4.5 × 2-inch size can be useful as an early reference, but it should not be called the size of every rectangular tissue box. Current supplier guides place examples between roughly 8.5 and 9.5 inches long, 4.25 and 5 inches wide, and 2 to 3.5 inches high. Tall family formats can exceed that height.
Low-Profile Rectangular Cartons
Low-profile cartons suit tables, desks, vehicles and covers with shallow cavities. A low center of gravity can improve stability during pulling. The limited height may require a wider or longer tissue stack, fewer tissues or more compression.
Designers should check whether the top opening remains easy to reach when the carton sits inside a reusable cover. A cover with a thick top panel can increase the distance between the tissue stack and the consumer’s hand.
Tall Rectangular Cartons
Taller cartons can hold a deeper stack but may no longer fit holders designed around low-profile boxes. Increased panel height can also make sidewall stiffness more important. A thin board that performs well on a two-inch panel may bow on a four-inch panel when tissues press outward.
The taller side provides more print space, but artwork still needs clearance from end folds, glue areas, manufacturer codes and case-contact scuff zones.
Cube Tissue Box Dimensions
Cube and boutique cartons use a compact square or near-square footprint with greater height. Published dimensions commonly cluster around 4.25 to 5 inches across and approximately 4.75 to 5.75 inches high. A well-known reference size for covers is about 4.5 × 4.5 × 5.25 inches, but cover sellers often ask buyers to measure because retail cartons differ.
Why Cube Cartons Need Separate Measurements
A cube carton may be described with one width value for both horizontal axes, yet its finished panels can differ slightly because of:
- Glue-lap placement
- Board thickness at folded corners
- Manufacturing tolerance
- Panel bow
- Overlapping bottom flaps
- Top-panel geometry
- Filled-stack pressure
Measure both horizontal directions rather than assuming a perfect square. This is especially important when the carton must slide into a rigid cover with little clearance.
Cube Carton Stability
The taller, narrower shape can feel compact on a vanity or nightstand, but pulling force near the top creates leverage. The base footprint, filled weight, surface friction and tissue-release force all influence whether the carton lifts, tips or stays in place.
A reusable cover can add weight, but it can also pinch the paperboard carton if its internal cavity is too tight. Test early, mid-stack and near-empty dispensing conditions because the pull angle changes as the stack becomes shorter.
Tissue Box vs Tissue Box Cover
A tissue box is the disposable primary retail carton that contains and dispenses facial tissues. It carries product information, branding, count, barcode and manufacturing codes.
A tissue box cover is a reusable holder placed over or around the retail carton. Covers may be made from wood, metal, ceramic, plastic, leather, textile, resin or paper-based board. Their main search intent is commercial because shoppers want a home, bathroom, office or vehicle accessory.
The two items need different measurements:
| Item | Measurement that matters most | Reason |
| Disposable tissue carton | Internal cavity and finished external size | Internal size holds the stack; external size controls shelves, cases and covers |
| Open-bottom cover | Internal length, width and height plus opening location | The cover slides over the filled carton |
| Cover with removable base | Internal cavity and closure clearance | The carton must enter and the base must close |
| Textile slipcover | Internal or finished sewn size and fabric stretch | Seam allowance and material flexibility affect fit |
| Rigid cube holder | Internal length, width, height and corner radius | Small dimensional errors can stop insertion |
| Wall-mounted dispenser | Approved refill-pack dimensions | The refill must fit the dispenser and feed correctly |
How to Measure a Tissue Box for a Cover
Measure the actual filled carton, not an empty flat blank or a product image. Use the largest normal sample from the intended SKU if the cover will be produced in quantity.
Step 1 Measure the Carton Length
Place the carton on a flat surface in its normal position. Measure the longest horizontal external side from the furthest finished edges. Keep the ruler straight rather than following a bowed panel.
Step 2 Measure the Carton Width
Measure the shorter horizontal side at 90 degrees to the length. Check the top, middle and bottom if the walls bow. Record the largest value that the cover must accept.
Step 3 Measure the Carton Height
Measure from the base to the highest structural point of the carton. Do not include a tissue projecting through the opening. Include any raised carton panel or closure that affects insertion.
Step 4 Check Corner Shape
Paperboard corners may be slightly rounded after folding. A rigid holder can have an internal corner radius that touches the carton before the flat walls do. Compare physical samples rather than relying only on straight-line dimensions.
Step 5 Locate the Dispensing Opening
Measure the opening’s length, width and center position from fixed carton edges. The cover aperture must let the tissue pass without rubbing, tearing or hiding the next sheet.
Step 6 Confirm Loading Method
Check whether the carton enters from an open bottom, a removable base, a side door or a top lid. The narrowest entry point may control fit more than the final internal cavity.
Step 7 Add Tested Clearance
Cover internal dimensions must be larger than the carton’s maximum finished dimensions, but there is no universal allowance. Clearance depends on:
- Cover material and thickness
- Manufacturing tolerance
- Internal corner radius
- Carton bow and compression
- Loading direction
- Surface texture
- Humidity response
- Need for easy removal
Too little clearance can crush the carton or make replacement difficult. Too much can let the box rattle, rotate or place its dispensing slit away from the cover opening.
For the core measurement method and the difference between inside and outside size, use this guide on how to measure a box.
Tissue Box Cover Dimensions Formula
For early planning only:
Minimum cover internal length = maximum carton external length + tested fit allowance
Minimum cover internal width = maximum carton external width + tested fit allowance
Minimum cover internal height = maximum carton external height + top and loading clearance
Do not apply the same random allowance to every project. A flexible sewn cover and a rigid ceramic holder behave very differently.
How Tissue Count Changes the Carton
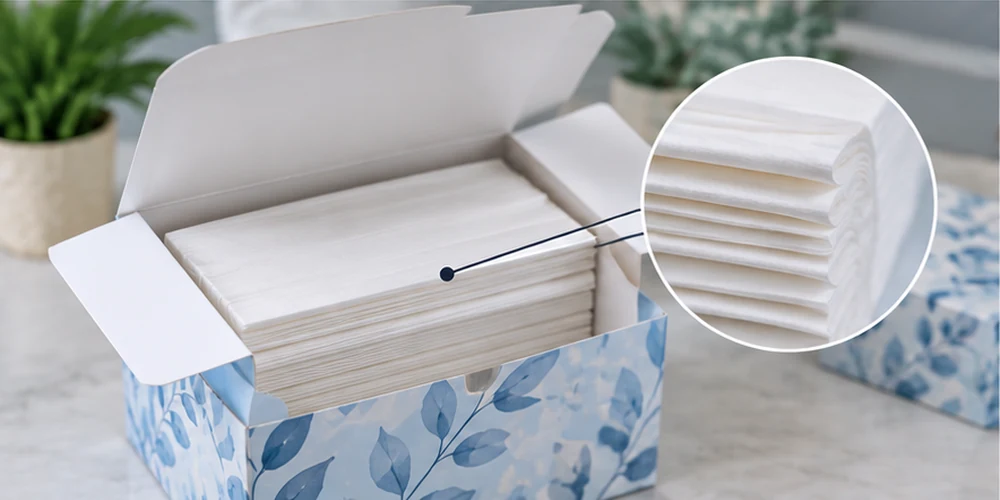
Tissue count influences stack height, but count alone does not determine finished tissue box dimensions. The stack is a layered system of sheet size, ply, embossing, fold pattern, fiber structure, moisture and compression.
Ply and Sheet Bulk
Two-ply tissue contains two joined webs for each finished sheet. Three-ply tissue adds another. More plies often increase bulk, but fiber furnish, embossing and calendering can change the result. A soft, bulky tissue may occupy more stack height than a denser sheet with the same nominal ply count.
Open Sheet and Folded Footprint
The consumer sees the tissue after it is pulled open, but the carton holds a folded footprint. The box length and width are based more closely on that folded stack than on the open sheet dimensions.
A change in folding pattern may reduce carton length while increasing stack layers. It can also change how strongly the next tissue follows through the dispensing slit.
Interfold Pattern
Interfolding connects the movement of one tissue with the next. The goal is usually to present a reachable tail without pulling several sheets at once. Fold overlap, sheet friction and dispenser resistance work together.
The carton must leave enough room for controlled movement without allowing the stack to shift excessively. Over-compression can raise pulling force or tear a sheet. Too little control can lead to double pulls or a tissue falling back into the carton.
Loading Compression
The stack may be compressed during insertion. Measure it after the planned conditioning and loading process, not only when loose. The carton needs to close without excessive panel bulge, yet the first sheet must still pull cleanly.
Why Simple Multiplication Fails
Multiplying one sheet’s thickness by the tissue count is not a reliable carton-height calculation. Folded sheets create multiple layers, air spaces, embossing and interlocked overlaps. Compression is also nonlinear. A production stack or representative hand-made stack provides better evidence.
Internal External and Score-to-Score Measurements
Different teams need different dimensions.
Finished External Dimensions
These describe the outside of the erected and filled retail carton. Use them for:
- Tissue box cover selection
- Retail shelf planning
- Display-tray fit
- Master-case arrangement
- Pallet planning
- Product photography scale
- E-commerce listing details
Measure a conditioned, filled and closed carton at its widest points.
Internal Carton Dimensions
These describe usable space for the tissue stack. They are influenced by board thickness, folds, end-flap overlap and glue. Use them for stack fit and loading-line development.
Score-to-Score Dimensions
Structural designers and converters may specify panels between crease centers on the flat blank. These values help create the carton but should not be presented to a shopper as the finished outside size.
Flat Blank Dimensions
Blank dimensions include every panel, flap and glue tab before folding. They control sheet yield, die layout and print imposition. They are not the same as assembled carton dimensions.
Paperboard for Facial Tissue Cartons
Facial tissues are lightweight, but the carton must resist stack pressure, run at production speed, remain square on shelf and survive repeated pulling. Board choice should reflect those demands.
Coated Recycled Board
CRB, CCNB and white-lined chipboard are common candidates for high-volume consumer cartons. They use recovered-fiber content with a coated print face. Print response, reverse color, odor, stiffness and cleanliness vary by mill grade.
Solid Bleached Sulfate
SBS provides a white fiber appearance, smooth print surface and clean cut edges. It may suit packs needing a light interior, fine graphics or a specific cleanliness profile. It can cost more than recycled board.
Folding Box Board
FBB uses a multi-ply structure that often provides useful stiffness at controlled mass. Regional availability and converting setup influence whether it is selected for a U.S. tissue line.
Coated Unbleached Kraft
CUK combines strong kraft fiber with a coated print surface and brown interior. It may suit structures requiring stronger tear performance or a natural interior appearance, subject to line and product testing.The full comparison of SBS, FBB, CUK, CRB, CCNB, WLC and URB appears in the paperboard grades for packaging guide.
Caliper and Stiffness
Paperboard caliper contributes to rigidity and changes fold allowance, but the thickest sheet is not automatically the best. Density, fiber direction, moisture and carton geometry influence panel behavior.
A buyer should request:
- Mill and grade name
- Caliper and tolerance
- GSM or U.S. basis weight
- Machine-direction stiffness
- Cross-direction stiffness
- Surface and reverse color
- Print-surface coating details
- Moisture range
- Grain direction
- Recycled-content declaration where claimed
- Recommended scoring and gluing settings
Dispensing Opening Design
The top opening is both a structural cut and a user interface. Its size, shape and resistance influence first opening, sheet release, dust protection and visual appearance.
Opening Length and Width
A longer opening gives the tissue more room to move but removes paperboard from the top panel. A narrow opening may control the next sheet but increase pulling force. The correct geometry depends on tissue width, fold pattern, stack height and any membrane or slit layer.
Opening Position
The aperture should align with the folded stack and cover opening. Small positional shifts can make tissues rub against an edge. The structural drawing should dimension the opening from fixed cut or score references rather than from artwork.
Perforated Tear-Away Panel
Many cartons ship with a perforated paperboard panel over the dispensing area. The consumer removes it before use. Perforation must tear cleanly without delaminating the top panel or leaving paper fibers that obstruct the opening.
Important controls include perforation pattern, bridge length, board direction, coating, tear path and start tab.
Film Slit or Paper-Based Alternative
A thin film with a slit can control tissue release and help present the next sheet. Material reduction or paper-based opening systems may be explored, but the change must be tested for first-pull force, double pull, fall-back, dust entry and recycling instructions.
Removing a component does not automatically improve the whole package if it increases tissue waste or causes cartons to fail during use.
Tissue Box Dieline and Structural Setup
A rectangular tissue carton is usually produced as a flat paperboard blank with main panels, end closures, a glue tab and a top dispensing area. Cube cartons use different panel proportions but require the same production controls.
The packaging dieline guide explains the technical roles of cut, crease, bleed, safe-zone, glue and finishing layers. For tissue cartons, the dieline should also identify:
- Finished panel dimensions
- Board grade and caliper
- Grain direction
- Glue-lap width
- Top aperture cut or perforation
- Film or paper dispensing component area
- End-flap sequence
- No-print glue zones
- Manufacturing code area
- Barcode panel
- Lot and date-code position
- Artwork orientation
Material Changes Require Dieline Review
Changing from one board caliper to another can alter crease width, fold memory, panel size and closure fit. A structure created for one material should not be scaled casually or sent to production without converter approval.
Prototypes Serve Different Purposes
A digital 3D view checks panel orientation, artwork continuity and visual balance. A plain physical blank checks carton dimensions and assembly. A filled production-material sample checks board stiffness, loading, dispensing and print.
The Pacdora review explains where online mockups help and where they stop. None of these views should be treated as a replacement for a line trial.
Printing Tissue Box Packaging
Tissue cartons carry branding across several large panels, yet their top surface is interrupted by the dispensing opening. Artwork must work before and after the tear-away panel is removed.
Offset Lithography
Offset printing is common for high-detail folding cartons using coated paperboard. It can reproduce photography, small type, gradients and controlled spot colors when prepress, ink, coating and drying are managed correctly.
Flexographic Printing
Flexography can suit high-speed work and selected board constructions. Plate, anilox, ink system and surface absorption influence detail and color. Text and barcodes should be tested at final production settings.
Digital Printing
Digital printing can help with prototypes, short runs, regional versions and seasonal designs. The board must sit within the press’s approved size, caliper and coating range. A digitally printed sample does not always predict offset or flexographic production color.
Designing Around the Opening
The consumer removes part of the top panel, so key brand elements should not disappear accidentally. Designers can treat the removable area as:
- A clearly marked opening instruction
- A temporary promotional panel
- Part of a pattern that remains balanced after removal
- A controlled blank area
Keep small text, logos and required information away from perforations unless the content is intentionally disposable.
Side and End Panels
Long side panels usually provide the strongest shelf branding space. End panels may carry product count, barcode, variant identification or opening instructions. Check how cartons face in shelf trays and cases before deciding which panel receives the main product identifier.
Color Control on the Actual Board
White screens and generic proofs cannot show how the selected board, coating and varnish will affect color. Packaging NextGen recommends approving an agreed color target on the planned substrate and inspecting production under defined viewing conditions.
Barcode and Code Placement
Place barcodes away from corners, folds, glue seams, heavy embossing and rough areas. Preserve quiet zones and test scans at final size after printing and coating. Date or lot codes need enough contrast and an accessible coding surface on the packing line.
Rub and Scuff Resistance
Cartons contact guides, belts, cases and neighboring packs. Test ink and coating after realistic filling, case packing and transport. A surface that passes a light hand rub may still mark during thousands of line contacts.
From Retail Carton to Master Case

The retail carton is normally grouped in a corrugated shipping case. A small change to tissue box dimensions can alter case count, board use, pallet pattern and freight cube.
Choose Carton Orientation
Rectangular cartons may be placed flat, on edge or in alternating patterns. Cube cartons offer more similar axes but can still have a preferred orientation for compression and retail unloading.
Calculate a Case Arrangement
For an early rectangular arrangement:
Case internal length ≈ cartons along length × selected carton axis + tested packing clearance
Case internal width ≈ cartons along width × selected carton axis + tested packing clearance
Case internal height ≈ number of layers × carton height + tested top clearance
This is only a starting calculation. Corrugated thickness, case joints, carton tolerance, loading equipment and hand access change the finished specification.
Avoid Excessively Tight Packing
A tight case can scuff print, crush carton corners or slow packing. It may also transmit corrugated flute marks into coated retail panels. Too much space allows movement and can reduce pallet stability.
Pallet Pattern
Evaluate:
- Pallet footprint
- Cases per layer
- Number of layers
- Total load height
- Case orientation
- Pallet overhang
- Corrugated compression
- Stretch-wrap force
- Warehouse humidity
- Retail unloading method
The current corrugated packaging news guide provides wider context on board, printing, automation and shipping-case developments.
Testing the Finished Tissue Pack
A tissue carton needs material tests, package tests and user tests. One passing board data sheet does not prove the erected and filled carton will perform.
Dimension and Fit Checks
- Measure finished external length, width and height at several points.
- Record panel bow and corner condition.
- Compare internal space with the loaded stack.
- Test the largest normal carton in the intended cover.
- Verify case loading with production samples.
Dispensing Checks
- First-sheet access
- First-pull force
- Single-sheet release
- Double-pull frequency
- Tissue tearing
- Next-sheet presentation height
- Fall-back into the carton
- Carton lift or tipping
- Performance at full, half and near-empty stack
- Behavior inside the intended cover
Carton and Print Checks
- Caliper and board condition
- Score and fold quality
- End closure and glue strength
- Aperture perforation tear
- Membrane bond and slit position
- Color against the approved target
- Ink and coating rub resistance
- Barcode scan grade
- Small-text legibility
- Lot-code readability
Storage and Distribution Checks
Condition samples at expected temperature and humidity before testing. Tissue, paperboard and adhesives can all respond to moisture. Compression, vibration and handling checks should match the real shipping route.
The International Safe Transit Association explains that its 1-Series procedures are screening tests, while 3-Series procedures simulate transport hazards for specific shipment types. Select a protocol based on the actual distribution system instead of adding an ISTA number only for marketing.
Packaging NextGen recommends recording the test method, sample size, environment, pass limit, production lot and approver. A result without those details is difficult to repeat.
Material and Recycling Considerations
Many tissue cartons use paperboard that contains virgin fiber, recovered fiber or a blend. The U.S. paper recycling system operates at scale: the American Forest & Paper Association reported that around 45 million tons of paper were recycled in 2025 and estimated a 61% to 65% U.S. paper recycling rate. These national figures do not prove that every tissue carton is accepted locally.
Evaluate the Whole Carton
Recycling behavior may be affected by:
- Plastic dispensing film
- Polymer lamination
- Metallic decoration
- Heavy wet-strength chemistry
- Adhesive quantity and type
- Product residue
- Non-paper cover components
- Local collection and mill rules
A reusable wood, leather or plastic cover is a separate product from the disposable carton. Do not transfer a recycling statement from the carton to the cover or vice versa.
Use Precise Environmental Claims
The FTC Green Guides summary says broad unqualified environmental claims can be difficult to substantiate. It also says recyclable claims should be qualified when suitable facilities are not available to at least 60% of consumers or communities where an item is sold, and partial recycled-content claims should state the percentage.
Better packaging copy identifies:
- The exact component being described
- Verified recycled-content percentage
- Whether the figure is pre-consumer, post-consumer or combined
- Required consumer separation
- Geographic qualification
- Evidence held by the brand
Common Tissue Box Sizing Mistakes
- Calling one size universal. Familiar proportions are not an industry-wide manufacturing standard.
- Failing to identify measurement type. Internal, external and score-to-score dimensions answer different questions.
- Using empty carton measurements. The filled tissue stack can create panel bow.
- Assuming a cube is perfectly square. Measure both horizontal axes.
- Choosing a cover from nominal size alone. Entry opening, corner radius and loading method affect fit.
- Ignoring the dispensing opening. A well-fitting cover can still block or rub the tissue path.
- Calculating height from tissue count alone. Ply, fold, bulk and compression change stack height.
- Changing board without updating the die. Caliper and crease response influence finished size.
- Approving only a 3D render. Digital views cannot prove material, loading or pulling performance.
- Placing key artwork on the tear-away panel. Branding may disappear after first opening.
- Packing master cases too tightly. Compression and scuffing can damage retail cartons.
- Printing broad recycling language. The finished structure and local access must be checked.
Tissue Carton Specification Checklist
Before requesting a quote or approving production, confirm:
- Product name and market
- Tissue count
- Ply count
- Open sheet dimensions
- Folded stack dimensions
- Fold pattern
- Loaded stack height and compression range
- Finished internal carton size
- Finished external carton size
- Dimension order and unit
- Board mill and grade
- Board caliper and tolerance
- MD and CD stiffness
- Grain direction
- Carton structure and glue seam
- Dispensing aperture dimensions
- Perforation pattern
- Film slit or paper dispensing system
- Print process
- Artwork safe zones
- Spot-color targets
- Coating and rub requirement
- Barcode and variable-code location
- Master-case count and orientation
- Corrugated case specification
- Cases per pallet and total height
- Humidity and storage conditions
- Approved physical sample
- Test plan and pass limits
- Recycling and recycled-content claim evidence
- Change-control procedure
Frequently Asked Questions
What Are Standard Tissue Box Dimensions?
There is no single universal size. A commonly quoted rectangular reference is about 9 × 4.5 × 2 inches, while many cube references are near 4.5 × 4.5 × 5 to 5.25 inches. Retail products vary, so measure the selected SKU or use an approved supplier drawing.
What Are Rectangular Tissue Box Dimensions?
Low-profile rectangular cartons often fall near 8.5 to 9.5 inches long, 4.25 to 5 inches wide and 2 to 3.5 inches high. Tall or family packs may reach approximately 4.75 inches high. These are planning ranges, not fixed standards.
What Are Cube Tissue Box Dimensions?
Cube cartons commonly fall around 4.25 to 5 inches across and 4.75 to 5.75 inches high. Measure both horizontal axes because the finished pack may not be perfectly square.
What Size Tissue Box Cover Do I Need?
Choose a cover whose usable internal length, width and height exceed the maximum finished external dimensions of the filled carton by a tested allowance. Also confirm the entry opening, internal corner radius and dispensing-aperture alignment.
How Do I Measure a Tissue Box Cover?
Measure the cover’s usable internal cavity, not only its outside. Record internal length, width and height, the narrowest loading opening, corner shape and top-aperture position. Compare those values with the largest normal carton sample.
Are Tissue Boxes Measured Length Width and Height?
Yes. A clear specification records length × width × height and identifies whether the figures are finished external, internal or score-to-score. Include inches, millimeters or centimeters.
Why Can Two Boxes With the Same Tissue Count Have Different Sizes?
The brands may use different open sheet sizes, folds, ply counts, embossing, fiber bulk, compression levels, board calipers or dispensing systems. Count alone cannot predict carton size.
What Paperboard Is Used for Tissue Boxes?
Coated recycled board, CCNB, WLC, SBS, FBB and other folding-carton grades may be used. The choice depends on stiffness, print, appearance, moisture, line speed, recycled-content goals, regional supply and cost.
How Large Should the Dispensing Opening Be?
There is no universal aperture size. It must match folded tissue width, overlap, stack pressure and the slit or paper system. Test first pull, single-sheet release, fall-back and near-empty use.
Can a Tissue Box Fit Any Tissue Box Cover?
No. Low rectangular, tall rectangular and cube packs differ. Even products within one format can vary by brand and count. Check internal cover measurements and loading access before purchase or production.
Are Tissue Cartons Recyclable?
Many clean paperboard cartons may be accepted in paper recycling programs, but local rules and added films, laminates or other components affect the answer. Check the finished pack and provide clear separation instructions where required.
Do Tissue Boxes Need Corrugated Shipping Cases?
Retail paperboard cartons are normally grouped in corrugated cases for storage and distribution. The case protects print, resists stacking loads and keeps multiple cartons together through warehousing and transport.
Measure the Carton Before Designing the Cover
Useful tissue box dimensions describe a specific filled package, not an assumed universal size. Record finished external length, width and height for covers, shelves and cases; record internal size for the folded stack; and keep score-to-score values inside the structural production file.
A good tissue carton also connects size with tissue count, fold pattern, paperboard, dispensing resistance, printing and distribution. Packaging NextGen treats the cover as a separate fit system: measure its internal cavity and entry opening, align both apertures, test real samples and verify use from the first tissue to the last.