
A Coca-Cola bottle is more than a liquid container. Its contour, red-and-white graphics, closure, label surface and shipping pack must work as one controlled packaging system. A lighter bottle may reduce material and transport load, but it still has to survive filling, handling, chilling, retail display and consumer use. This is why Coca-Cola bottle packaging offers a useful lesson for any beverage brand: do not approve the bottle first and treat printing as an afterthought. At Packaging NextGen, we view the container, artwork, decoration, closure and transit pack as connected parts of the same specification.
What Makes Coca-Cola Bottle Packaging Important?
Coca-Cola bottle packaging combines a recognizable container shape with tightly controlled decoration and high-speed production requirements. The best-known example is the contour bottle, designed to remain recognizable through shape as well as graphics. In a 2014 UK project reported by Packaging World, a 330ml glass contour bottle reached 190 grams while retaining its established dimensions, quality and strength, according to its glass supplier. That change showed how packaging weight can be reduced without casually changing the identity consumers recognize.
For packaging and printing teams, the main lessons are clear:
- Bottle geometry affects strength, filling-line behavior and the available print area.
- Lightweighting must be tested with labels, decoration, closures and secondary packs.
- Curved glass changes how artwork, white ink, small text and barcodes reproduce.
- Condensation, ice buckets, rubbing and returnable-bottle washing can expose print weaknesses.
- A production sample is more reliable than approving artwork only on a flat screen.
The 2014 UK 330ml Coke Bottle Case
Packaging World reported in February 2014 that Ardagh Group had reduced the weight of the 330ml UK Coca-Cola glass bottle to less than 200 grams. The new bottle weighed 190 grams. The equivalent bottle had weighed 240 grams in 2005, so the reported change removed 50 grams of glass, a reduction of about 20.8%.
The same project covered 330ml Sprite and Fanta bottles. It also referenced a 200ml Coca-Cola mixer bottle that had moved from 170 grams in 2002 to 140 grams in 2014, a reduction of about 17.6%. Ardagh credited design technology and changes in the glass-forming process while stating that the bottles retained their required quality and strength.
These figures should be read as historical project data, not as a claim that the 190-gram bottle is still the lightest option in every market. Bottle specifications vary by country, filling plant, beverage, return system and year. “Lightest” is meaningful only when the bottle volume, material, pressure requirement, neck finish, test method and distribution route are also stated.
| Bottle project | Earlier weight | Reported later weight | Weight change | Packaging note |
| UK 330ml contour glass bottle | 240g in 2005 | 190g in 2014 | 50g, about 20.8% | Trademark dimensions, quality and strength were reported as retained |
| 200ml Coca-Cola mixer glass bottle | 170g in 2002 | 140g in 2014 | 30g, about 17.6% | A separate smaller glass format |
| Selected North American PET bottles | 21g before redesign | 18.5g in 2024 | 2.5g, about 11.9% | Different material, market and bottle sizes; not a direct glass comparison |
The third row provides current context. In 2024, The Coca-Cola Company announced a lighter PET design for selected 12-, 16.9- and 20-ounce sparkling beverage bottles in North America. It reported a change from 21 grams to 18.5 grams. Glass and PET respond differently to pressure, heat, contact and decoration, so the numbers should not be used to declare one pack superior to another.
A Coke Bottle Is a Complete Packaging System
The bottle receives most of the attention, yet commercial performance depends on several layers working together:
- Primary container: the glass or PET bottle that holds the drink.
- Closure: crown cap or plastic cap, liner, tamper evidence and opening experience.
- Print and decoration: paper label, pressure-sensitive label, sleeve, direct print, embossing or a mixed system.
- Secondary packaging: carton, tray, divider, crate, shrink film or multipack carrier.
- Tertiary packaging: pallet pattern, stretch wrap, corner protection and transport controls.
A change at one layer can create a problem elsewhere. Removing glass can change contact points on a production line. A different label can alter recyclability, scuff behavior or wash-off performance. A new bottle diameter can affect case count, divider geometry and pallet use. Packaging NextGen recommends freezing the complete pack specification only after the filled and decorated bottle has passed line and transport trials.
Why the Coca-Cola Contour Bottle Matters
The Root Glass Company developed the contour bottle in 1915. According to Coca-Cola’s official history, the goal was to create Coca-Cola bottle packaging that could be recognized by touch and identified even from a broken piece. That brief turned the container itself into a brand signal rather than a neutral surface carrying a logo.
From a packaging perspective, the contour shape creates both value and constraints. Its waist improves grip and strengthens brand recognition, but the changing diameter limits flat label space. The shoulder, sidewall, heel, and base must distribute material while supporting filling and transport loads. The embossed script and surface transitions also influence where a label can sit and where direct decoration can remain readable.
This is structural branding: identity remains recognizable even when the label is hidden, wet, or damaged. Smaller beverage companies can apply the same principle without copying a protected bottle. A consistent shoulder angle, grip zone, embossing detail, closure color, or label silhouette can become a distinctive and repeatable brand cue.
How Lightweight Glass Bottle Design Works
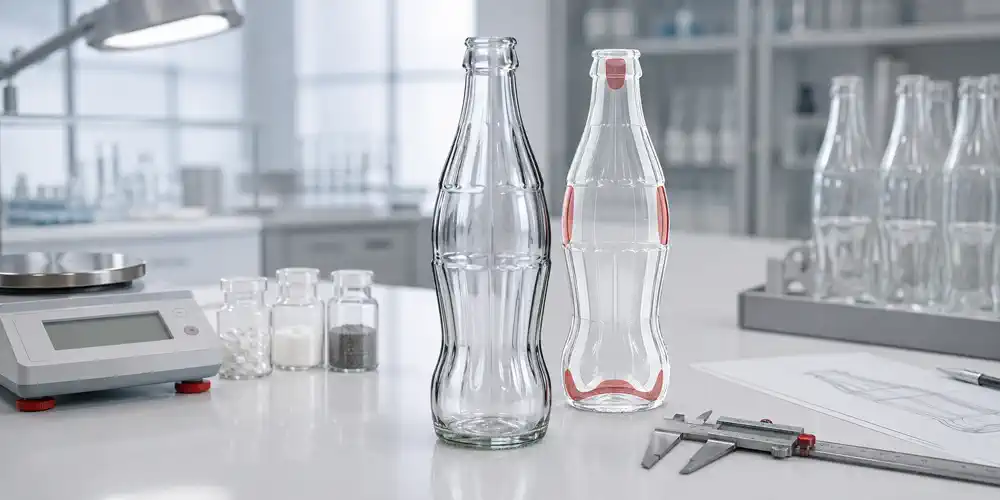
Lightweighting is not simply making every wall thinner. Glass engineers adjust how molten glass is distributed through the body so that critical areas receive enough material. The design team studies the finish, neck, shoulder, sidewall, heel and base because each area sees different forces.
1. Neck Finish and Closure Interface
The neck finish controls closure fit and sealing. Dimensional drift can lead to capping trouble, leaks or excessive line rejects. A weight-reduction project should protect finish tolerances before it chases savings elsewhere.
2. Shoulder and Sidewall
The shoulder moves load from the neck into the body. Abrupt geometry can concentrate stress. Sidewalls face contact from guide rails, neighboring bottles and packing equipment. Material distribution and surface quality matter as much as average bottle weight.
3. Heel and Base
The heel often meets conveyor rails and impact from adjacent containers. The base must keep the bottle stable while tolerating filling-line and distribution conditions. A lighter bottle that rocks, chips or shows inconsistent standing height can create losses beyond the material saved.
4. Bottle-to-Bottle Variation
An average weight does not show whether glass is consistently placed. Two bottles can weigh the same but behave differently if one has thin local areas. Process control, inspection data and samples from multiple mould positions help identify variation.
5. Real Distribution Conditions
Laboratory results need confirmation on the filling line and through the planned supply route. Conveyor contact, accumulation, rapid temperature changes, case packing, pallet vibration and retail handling can reveal risks that a static drawing cannot.
Digital tools can help teams review geometry and presentation before physical production. A 3D packaging mockup is useful for early visual checks, while 3D-printed packaging prototypes can support grip, scale and pack-out reviews. Neither replaces production glass samples or filled-pack testing.
What Lightweighting Changes for Bottle Printing
Printing cannot be separated from bottle engineering, especially in Coca-Cola bottle packaging. The artwork may be unchanged, yet a lighter container can require new line settings and fresh decoration trials.
For a glass bottle, teams should check whether revised mould geometry changes the label panel, seam location, surface waviness, or bottle-to-bottle position. Contact pressure at label application and handling stations should be verified against the approved bottle. For PET, lower wall mass can also increase sensitivity to squeeze, vacuum, or heat during sleeving and line handling.
The print supplier, bottle supplier and filler should review:
- Label application pressure and speed
- Label-panel diameter and taper
- Mould seam and embossing position
- Surface cleanliness before printing or labeling
- Ink, coating and adhesive cure
- Rub points on rails, dividers and neighboring bottles
- Condensation and ice-water exposure
- Barcode and small-text legibility after application
- Rejection rates during start-up and full-speed running
The safest approval sequence moves from a technical drawing to a decorated sample, then a short line run, followed by production-speed and distribution checks.
Coca-Cola Bottle Printing and Decoration Options
Bottle decoration is selected according to volume, bottle system, return route, graphic coverage and cost. Availability differs by glass supplier and filling network.
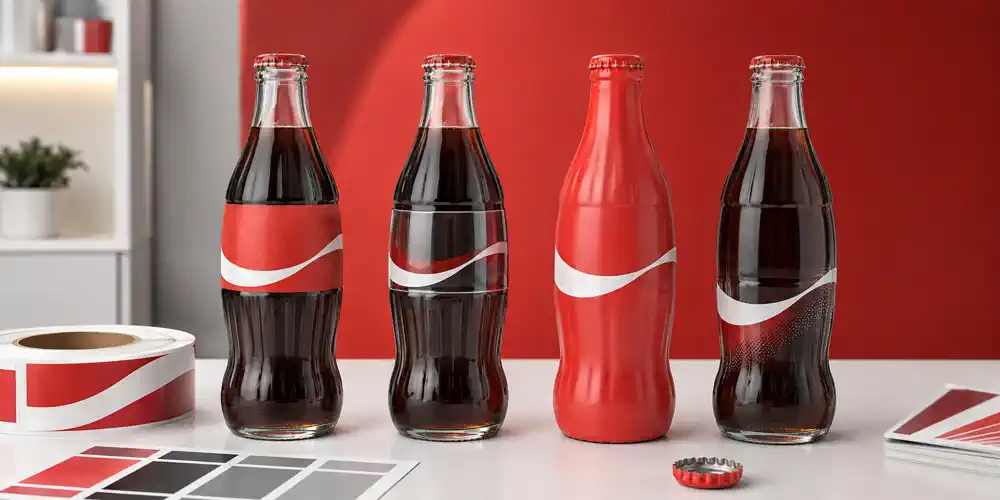
| Print or decoration method | Best use | Main benefits | Points to check |
| Wet-glue paper label | High-volume glass bottles with defined label panels | Familiar process, strong color reproduction, economical at scale | Condensation resistance, edge lift, adhesive spread, wash-off behavior |
| Pressure-sensitive label | Premium or shorter runs needing clean placement | Sharp detail, several films and papers, no wet-glue station | Adhesive choice, liner waste, clear-label appearance, recycling route |
| Shrink sleeve | Near-full-body graphics or complex bottle geometry | Large print area and strong shelf impact | Shrink distortion, seam placement, PET deformation risk, sorting compatibility |
| Direct screen print | Selected glass or plastic packs with limited color sets | No separate label, durable brand marks, tactile ink options | Curvature, registration, ink adhesion, cure and minimum order |
| Applied ceramic decoration | Glass bottles needing durable decoration | High resistance when specified correctly | Firing compatibility, color limits, supplier capability and return system |
| Embossing or debossing | Permanent brand cues in the container | Identity remains without a label | Mould cost, stress review, cleaning and label interference |
| Crown-cap printing | Glass bottles using metal crown closures | Adds a visible top-view brand cue | Color match, ink rub, liner, crimp and registration tolerances |
No method wins in every project. A returnable glass bottle may need decoration that tolerates repeated handling and washing. A single-use bottle may put more weight on sorting and material recovery. A short seasonal run may favor labels, while a long stable run can support direct decoration economics.
Printing Challenges on Curved Glass Bottles
Flat artwork behaves differently when wrapped around a cylinder or a contoured surface. The printer and designer should solve the following issues before release.
Distortion and Readable Zones
Artwork near a shoulder or heel can appear compressed when viewed from the front. Important words, nutrition data and mandatory statements belong in zones where curvature does not reduce legibility. A 3D render is helpful, but a rotating physical proof provides better evidence.
Mould Seams and Surface Variation
Glass bottles commonly have seams and small surface variations. Fine type or a barcode placed across a seam may not scan or print consistently. The approved bottle drawing should identify safe decoration zones and no-print areas.
White Ink and Opacity
Clear glass allows the beverage, background and rear label to affect front graphics. White ink can create a base for brand colors, but insufficient opacity may dull red or reduce text contrast. On green or amber glass, the container color can shift the perceived print color.
Condensation, Ice and Adhesion
Cold bottles collect moisture. Paper, adhesive, ink and varnish should be selected for the intended chilling conditions. A label that looks correct when dry may bubble, slide or lift after refrigeration and an ice-bucket test.
Scuff and Rub
Bottles touch guides, cartons, dividers and one another. Graphics should be checked after simulated transport and line contact, not only after printing. A rub test must reflect the actual bottle surface and pack arrangement.
Returnable Bottle Washing
Returnable systems create a different brief. The label or decoration may need to survive several journeys, or it may need to release cleanly during washing. The choice depends on the local pool, washer conditions and refill model. Claims about wash cycles should come from validated system data rather than a generic supplier statement.
Prepress Workflow for Bottle Labels and Direct Decoration
A controlled prepress process reduces surprises at the filler, making it an essential part of Coca-Cola bottle packaging. Packaging NextGen recommends the following sequence as a practical starting point:
- Obtain the approved bottle drawing with tolerances, seams, embossing and decoration limits.
- Confirm the decoration process, substrate, number of colors and required coatings.
- Build artwork on the supplier’s current template rather than an old PDF.
- Keep spot colors, process colors, white ink, varnish and technical marks on clearly named layers.
- Add trapping and overprint settings according to the printer’s separation plan.
- Correct graphics for bottle taper, viewing angle and shrink distortion where applicable.
- Protect quiet zones around barcodes and test them on the curved final pack.
- Check legal copy, nutrition information, deposit marks and language requirements for the target market.
- Review a color proof and a 3D view, then approve a physical decorated bottle.
- Keep the signed sample and version-controlled artwork as production references.
Teams unfamiliar with technical packaging artwork should review what a dieline is before building the label template. Bottle artwork may use a printer drawing rather than a folding-carton dieline, but the same discipline applies: dimensions, bleed, safe area, technical layers and production notes must be unambiguous.
Keeping Coca-Cola Red Consistent on a Bottle
A famous brand color is not controlled by typing a color value into design software. The final appearance depends on the ink system, white backing, glass color, label material, varnish, surface gloss, print process and viewing light.
For stable color across a bottle family, define the approved color standard and measurement condition. Compare production samples against a signed master on the actual substrate. Clear label film, white paper and direct ink on glass can make the same color formula appear different, so each route may require its own approved target.
The bottle should also be reviewed beside its cap, tray, carton and multipack. Consumers see the full shelf unit. A red label that matches the master on its own may still appear inconsistent if the closure or printed case shifts warmer or darker.
Closure, Neck Finish and Top-View Printing
The closure is a small component with a large job. It must maintain the seal, support tamper evidence where required, tolerate filling conditions and open as intended. Glass contour bottles may use a metal crown cap in certain formats, while PET packages generally use plastic closures suited to their neck finish and beverage pressure.
Cap graphics create a top-view branding opportunity in cases, coolers and social photography. Print teams should confirm ink adhesion and rub resistance after capping because metal deformation and crimping can affect decoration. Packaging engineers should check liner compatibility, sealing performance and closure application settings as part of the same trial.
Secondary and Tertiary Packaging for Coke Bottles
A well-designed bottle can still fail in a weak shipping system. Glass formats may require corrugated cases, paperboard multipacks, reusable crates, dividers or trays that control bottle contact. PET formats may use trays, shrink film, paperboard carriers or wraparound cases.
Key decisions include:
- Bottle count and orientation per case
- Clearance around labels and printed surfaces
- Divider height and edge position
- Case compression under pallet load
- Hand holes and retail opening features
- Pallet pattern and overhang
- Stretch-wrap force
- Moisture exposure in cold-chain or warehouse conditions
When case size changes, record the finished internal and external measurements correctly. The guide on how to measure a box explains why internal dimensions control product fit while packed external dimensions control storage and transport space.
Printed corrugated and paperboard also carry brand cues. Case artwork should use large, scannable product identifiers, orientation marks and lot information without crowding. If the bottle label and transport case are printed by different suppliers, shared color references and version control help prevent mixed visual systems.
Quality Checks Before Commercial Release
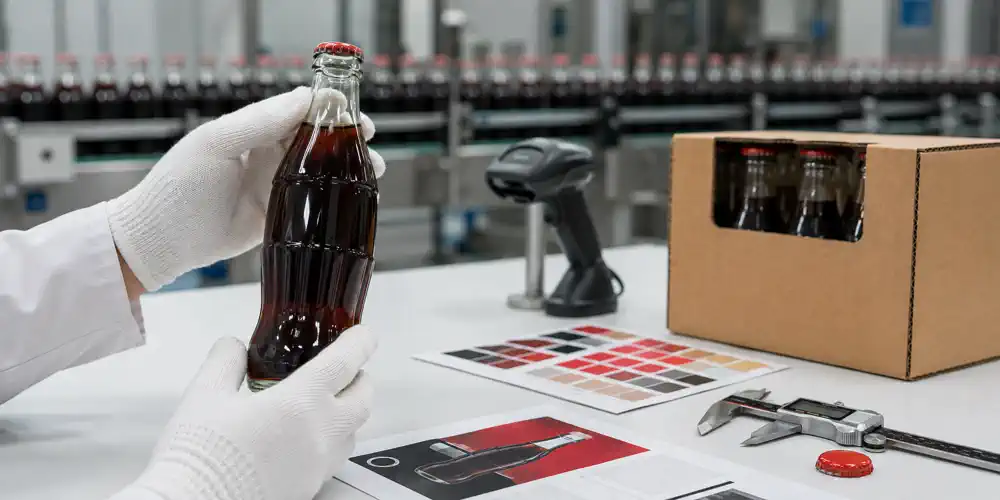
The exact tests depend on bottle material, beverage, filling process, market and distribution route. A release plan may include:
Container checks
- Weight and dimensional tolerances
- Material distribution for glass or wall profile for PET
- Finish and sealing-surface inspection
- Vertical load, impact and pressure tests where relevant
- Thermal-shock checks for the planned process
- Base stability and conveyor travel
Print and label checks
- Color against the approved master
- Registration and print position
- White-ink opacity
- Ink or coating cure
- Label adhesion in dry, chilled and wet conditions
- Rub, scratch and scuff resistance
- Barcode and QR-code scans at several angles
- Small-text legibility after application
Filled-pack checks
- Closure application and seal integrity
- Full-speed line trial
- Accumulation and guide-rail contact
- Case packing and unpacking
- Vibration, drop and pallet checks suited to the route
- Retail display and consumer opening review
Packaging NextGen advises recording the test method, sample size, pass limit, environment and responsible approver. “Passed” has little value if nobody can tell which production batch, speed or conditioning period was tested.
Glass vs PET: Packaging and Printing Differences
Both materials can support a strong beverage pack, but their engineering and decoration needs differ.
| Area | Glass bottle | PET bottle |
| Structure | Rigid and relatively heavy; local impact and material distribution are critical | Light and flexible; pressure, vacuum, heat and panel behavior require control |
| Surface | Hard surface suited to labels and selected direct-decoration processes | Labels and sleeves are common; surface treatment and bottle flex affect results |
| Chilling | Condensation affects paper labels, inks and adhesives | Condensation also matters; thin walls may react to application pressure and sleeve heat |
| Reuse | Can suit refill pools when bottle and decoration are designed for repeated cycles | Reuse exists in selected systems but needs a purpose-built bottle and local infrastructure |
| Shipping pack | Often needs more protection from impact and bottle contact | Lower mass reduces some loads, though bottle stability and compression still matter |
| Print decision | Consider seams, glass color, label panel, wash route and scuff | Consider flex, shrink response, label separation and recycling compatibility |
The right material depends on the product, plant, route, recovery system and commercial brief. Weight alone does not establish the environmental result, and a recycling symbol alone does not prove that a package will be collected or processed in its target market.
What Beverage Brands Can Learn From the Coke Bottle
The Coca-Cola bottle packaging demonstrates that brand recognition can be built into the container’s structure, not just its printed graphics. It also highlights why change control matters: when a familiar bottle becomes lighter, its feel, silhouette, and decoration must remain consistent to preserve consumer recognition and brand identity.
For a beverage brand planning a new bottle or redesign, use these principles:
- Write one system brief. Include container, closure, decoration, case, pallet and filling line.
- Design around real viewing conditions. Test a wet, chilled and filled bottle, not just a studio render.
- Reserve safe print zones early. Do not place mandatory copy after mould geometry is fixed.
- Prototype the shelf set. View all sizes and flavors together with their multipacks.
- Test the fastest line condition. A pack that runs at low speed may fail during commercial accumulation.
- Measure color on each substrate. Paper, film, glass and metal create different visual results.
- Validate recovery claims locally. Collection and processing systems vary by market.
- Keep a signed production standard. Artwork files alone do not show final color, position or finish.
Common Bottle Packaging and Printing Mistakes
Avoid these frequent errors:
- Choosing a label before confirming the bottle panel and seam location
- Approving barcodes only on a flat PDF
- Ignoring condensation and ice-water exposure
- Using one color target for paper, film, glass and closures without physical matching
- Reducing bottle weight without rerunning line and transit checks
- Allowing embossing to enter the adhesive or barcode zone
- Testing a hand-applied label but skipping machine application
- Changing the bottle diameter without recalculating case and pallet use
- Making broad recycling claims without checking the local system
- Launching production without a signed decorated-bottle standard
Frequently Asked Questions
What was the weight of the lightweight 330ml UK Coke bottle?
The 2014 UK glass bottle reported by Packaging World weighed 190 grams. It had weighed 240 grams in 2005, which represents a 50-gram reduction of about 20.8%. Treat this as a dated project figure rather than a current global specification.
Why is the Coca-Cola bottle shape so recognizable?
The contour bottle was developed so people could recognize it by shape and touch, not only by its label. The waisted profile, shoulder and embossed details allow the container itself to carry brand identity.
What is the best printing method for a glass beverage bottle?
There is no single best method. Wet-glue labels suit many high-volume glass lines, pressure-sensitive labels support sharp detail and shorter runs, while direct screen print or ceramic decoration may suit selected projects. The return model, condensation exposure, run size and local recovery route should guide the choice.
Can a shrink sleeve be used on a Coke-style contour bottle?
Yes, a sleeve can cover complex geometry, but the artwork needs distortion correction and a controlled seam position. The converter must test shrink behavior, readability and compatibility with the container material and recovery route.
How does condensation affect bottle labels?
Moisture can weaken paper, reduce adhesive grip, cause edge lift or change ink and coating appearance. Testing should include refrigeration, wet handling and the expected time in an ice bucket or cooler.
What print files does a bottle label supplier need?
The supplier normally needs editable vector artwork built on its approved template, with fonts outlined or supplied, images linked at suitable resolution, and spot colors, white ink, varnish and technical layers clearly named. Requirements vary, so use the printer’s current specification.
Is a lighter bottle automatically more sustainable?
No. Lower material use can be beneficial, but the full result also depends on production energy, recycled content, breakage, transport, reuse, collection and actual recycling. Compare equivalent packages within the same market and distribution system.
Does lightweight glass reduce print quality?
Not automatically. Print quality depends on the decoration surface, process control, ink or adhesive system and line setup. A changed bottle should still receive new print-position, adhesion, scuff and line trials.
Should the barcode be placed on the most curved part of a bottle?
Usually not. Strong curvature can narrow bars when viewed or scanned from certain angles. Place the code in an approved low-distortion zone, preserve its quiet area and verify it on filled production samples.
What should beverage startups test before ordering bottles in volume?
Test bottle dimensions, closure fit, label placement, condensation resistance, scuff, barcode scans, filling-line travel, case pack-out and transit performance. Approve the filled and decorated package, not isolated components.
Final Takeaway
Coca-Cola bottle packaging succeeds because structure and graphics reinforce one another. The 190-gram UK glass bottle was a notable 2014 lightweighting milestone, but its larger lesson is about system control: a bottle change must protect the contour, sealing interface, print zone, production line and transport pack at the same time. Packaging NextGen can use this case as a practical reference for beverage brands that want lighter packs, clearer print decisions and fewer surprises between artwork approval and commercial filling.
Editorial Source Notes
- Packaging World, “New Coke bottle for UK is lightest 330mL ever,” February 14, 2014.
- Ardagh Group, European glass innovation case information on the 240g-to-190g contour bottle change.
- The Coca-Cola Company, official history of the contour bottle and the Root Glass Company brief.
- The Coca-Cola Company, 2024 North American lightweight PET bottle announcement.
Editorial note: Historic weights and company performance statements are attributed to the organizations that published them. Packaging specifications should be confirmed with the bottle supplier and filler for the intended market.